Yesterday I sort of had the somewhat-obvious-in-hindsight epiphany that comics keep being hard for me because I do it differently every time: I get art-process-amnesia and start a completely different way than last time. While that works for short projects, it’s not sustainable in the long term. So I’m writing down my process in detail not only to remind myself of what I did, but also why I did it that way. This is mostly for myself, but I thought I might post it to give a glimpse of this idea process, and in case it gives anyone else any ideas or insight to help their own process.
THE PROCESS OF CYPHER CREEK
Specifically, I’m looking at my process for my 21 page senior project, The Occult Mishaps of Cypher Creek. As the longest work I’ve done so far, (as well as one I wanted to make a process book for but didn’t have the time) this is the most detailed my process has probably ever been. For shorter or different types of projects, this will probably be different, but here’s how I did it.
STEP 1: Pitch BIBLE
For this project, I started out with a loose pitch bible where I had the pitch, the characters, plot, world building, themes/motivations/character arcs, and my inspirations.
I most definitely didn’t write it in that order– It was basically written loosely in reverse order, and then I jumped around from there and expanded each part. I usually start with story beats or ideas I want to explore, and any similarly themed inspirations that I enjoy and would keep me motivated. Whenever I draft things, I describe it literally as word vomit. I do this with everything- essays, comics, scripts, this post, etc. I start with the fundamentals and then build up on it, like finalizing a loose sketch. (My Drawing II professor once noticed this when I was writing an artist statement and then announced it to the full class. It was a little awkward, but helped me realize that’s just how I work on things.) It’s kept casual, not focused on being pretty unless I can’t understand it myself.
My Cypher Creek Pitch Document looks like this:

PITCH:
- Tagline/Elevator pitch paragraph
- Quick summary with touch of character arcs, themes, tone, etc.
CHARACTERS:
- Quick Summary of each Character
- Role in story + how they know other characters
- Motivation/Problem/Arc
- Notes on design if needed
- Character Concept art
PLOT:
- Link to Script Document (Written later)
- Section for Beginning, Middle and End
- Divided each section into specific scene summaries, in bullet points
WORLD BUILDING:
- Added notes to self about the story, world building, little ideas for illustrations or notes between characters
- Ideally here there would also be sketches of the scene sets.
THEME/MOTIVATION/ARCS:
- Specific Themes written out and notes on how they show in the story
- Notes on how each important character’s arcs revolve around the theme
- Notes on how the reader sees and interacts with these themes visually
- Any other notes on narrative parallels, metaphors, symbols, etc. if any
PLOT IDEAS:
For Cypher Creek, this was a list of Cryptids or funny paranormal things specifically– this would look different for other stories. Here I free-thought generated as many ideas for plots or creatures as I could for different scene ideas.
This is early in the idea process, but I thought it was important to keep in, just in case I needed to change or expand on the story.
INSPIRATIONS:
- Stories that inspired me or have a similar vibe to what I’m going for. Helps to keep me motivated and remind me of why I was doing this– to make a cool work I enjoyed making and reading, and hopefully others enjoy too. Constantly added to when I remembered other things.
STEP 2: SCRIPT
In a separate document, I wrote the script. I change up how I script a lot, but for this I had it formatted like this:

Scene # (and Page #s), Description of what happens, any specific shot ideas or visual beats, and the dialogue. I also sometimes include notes about the purpose of each scene or things to keep in mind when I thumbnail. My scripts are not clean by any means.
For this I also made a second script document that was dialogue only so I could copy it to my thumbnail document. The dialogue usually gets reworded for space so I don’t sweat it if it’s not the same.
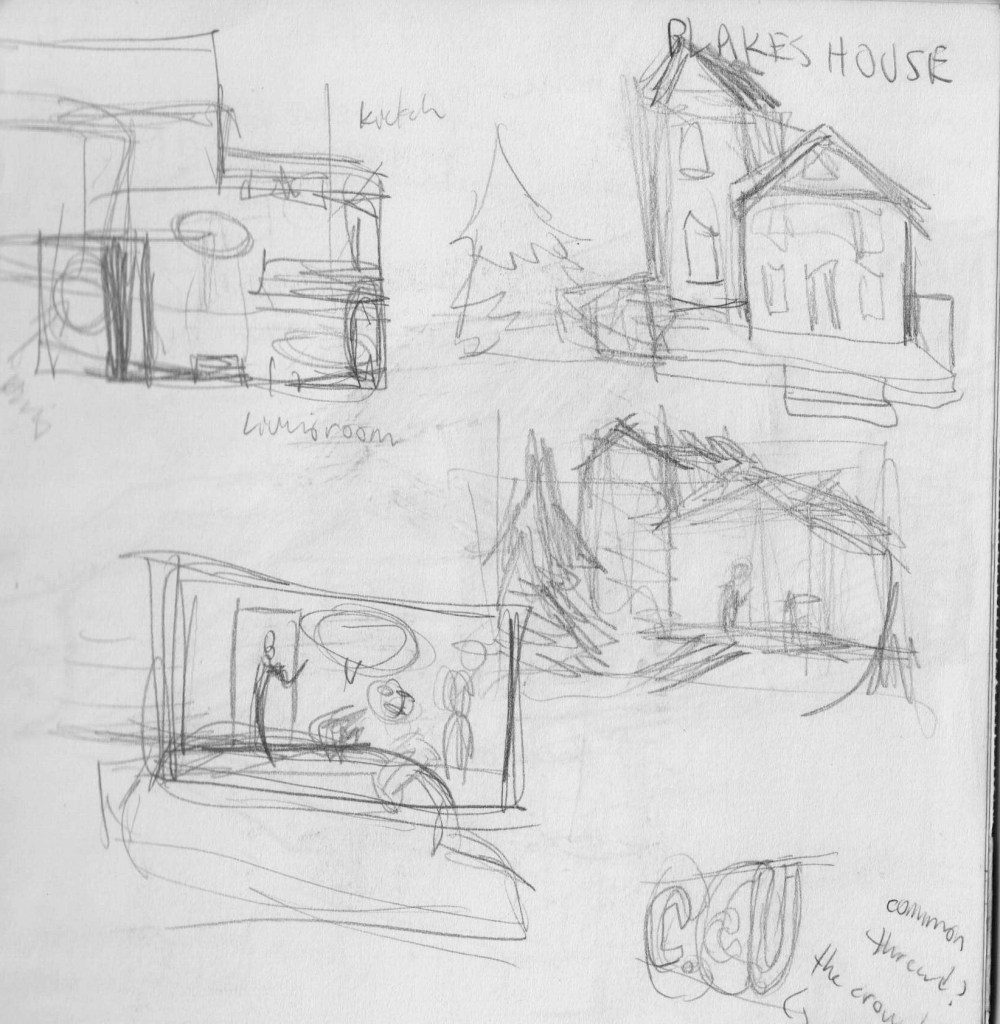
STEP 2.5: CHARACTER + SET DESIGN
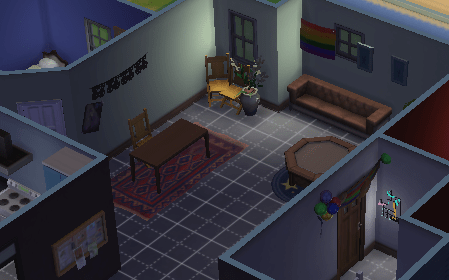
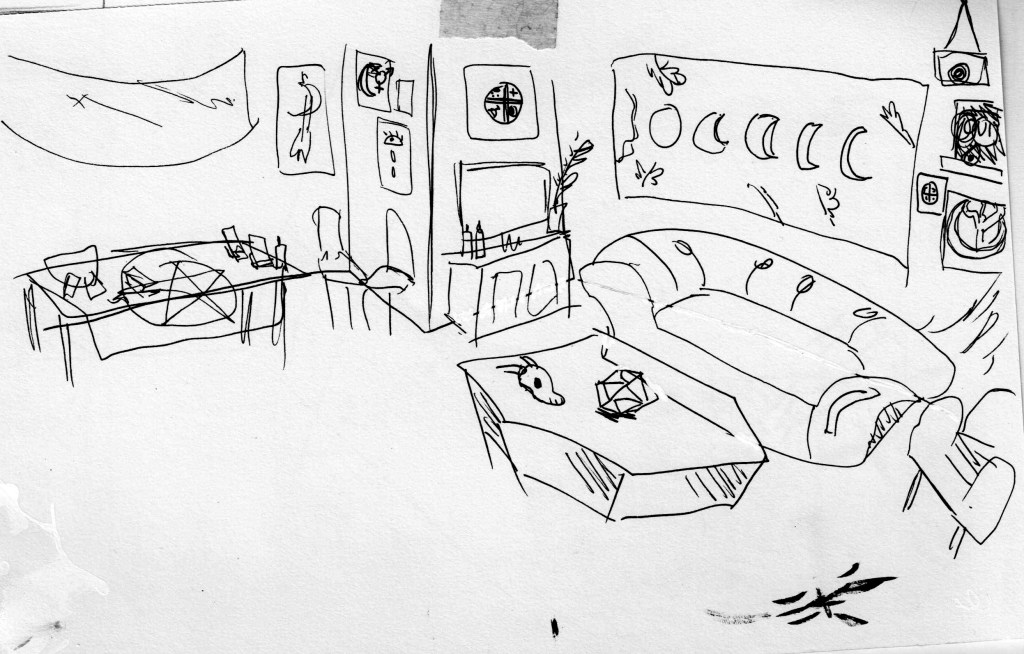
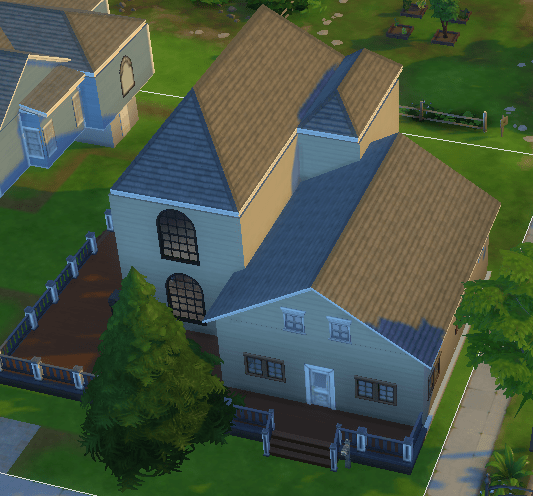
Usually this is an earlier step for me, but if it hasn’t been done yet, don’t proceed until it is! I always do the character design but often forget the importance of environment design. While I was working on this, I hit a big road block when I got to penciling pages 4 and 5– These were the first pages with all 5 main characters, and I needed a way to have them move around as they talk to reveal the final character as the scene progressed. For comics with a lot of scenes in different places, characters moving, etc, having a reference of what each place looks like helps me visualize the scene as I thumbnail, and makes the changes later less drastic. For this scene in particular when i couldn’t get my head around it, I modeled a version in the Sims.
STEP 3: THUMBNAILS
I usually try to thumbnail digitally for ease. I’ve started formatting my thumbnails like this, with a spread together but room on either side for dialogue and notes:

The thing that helps me create is iteration. I constantly have to remind myself of this. Whenever I get stuck, I remind myself that it isn’t the final product, and there’s no reason to be so stressed about it not being good or perfect. This loosens me up to keep drafting a shot or a scene if I don’t like it, because the stakes are low. Thumbnails can be a HUGE hurdle to me for this reason but iteration and the other prep work helps me a lot to get past it. Another thing in the process of that helps with iteration is:
STEP 4: ROUGHS
I started doing roughs only about a year ago and it is ridiculous how much they help me. I tried doing them full sized (11 x 17) for a little while until I focused on them too long and they became too close to pencils. The point of the roughs is the iteration, and it’s another way to solve composition issues before they get to the page.
For Cypher Creek I did my roughs at ¼ of the size I draw at– big enough to get more details than thumbnails, and scribble in the words, but not pencil level. Although my thumbs were digital, I did these traditionally in a notebook, with one page per spread and an empty page for notes, reworking dialogue, or sketching a shot a few times to get it right. The benefit of drawing them at ¼ scale is I can also measure panel sizes and scale them up for easier proportions.


STEP 5: ACTUALLY DRAWING THE DANG COMIC
After all that, I have everything I need to start penciling and physically making the comic. At this point, all of the hard work of thinking and fleshing things out should be done, so drawing it is usually a bit easier. I feel like the main part of my process I have trouble with is remembering all these before-the-drawing-steps, and doing them in the right order to help me the most, so I don’t need to struggle as I work. I do have some tricks for penciling that make it faster but since I’m thinking about starting to pencil digitally, that might not be as needed.

So yeah, that’s my story fleshing out process! Hopefully writing this will help me with the projects I’m working on, and ones I’ve been desperately wanting to go back to. Thanks for reading and let me know if you got anything out of it!

Whoa, I’ve come across artists here on WordPress, but I can’t say I’ve ever stumbled across such detailed posts showing the creative process. Loved going through this. Thanks for sharing, and keep em coming!
LikeLiked by 1 person
Thanks so much, I appreciate your kind words!
LikeLike